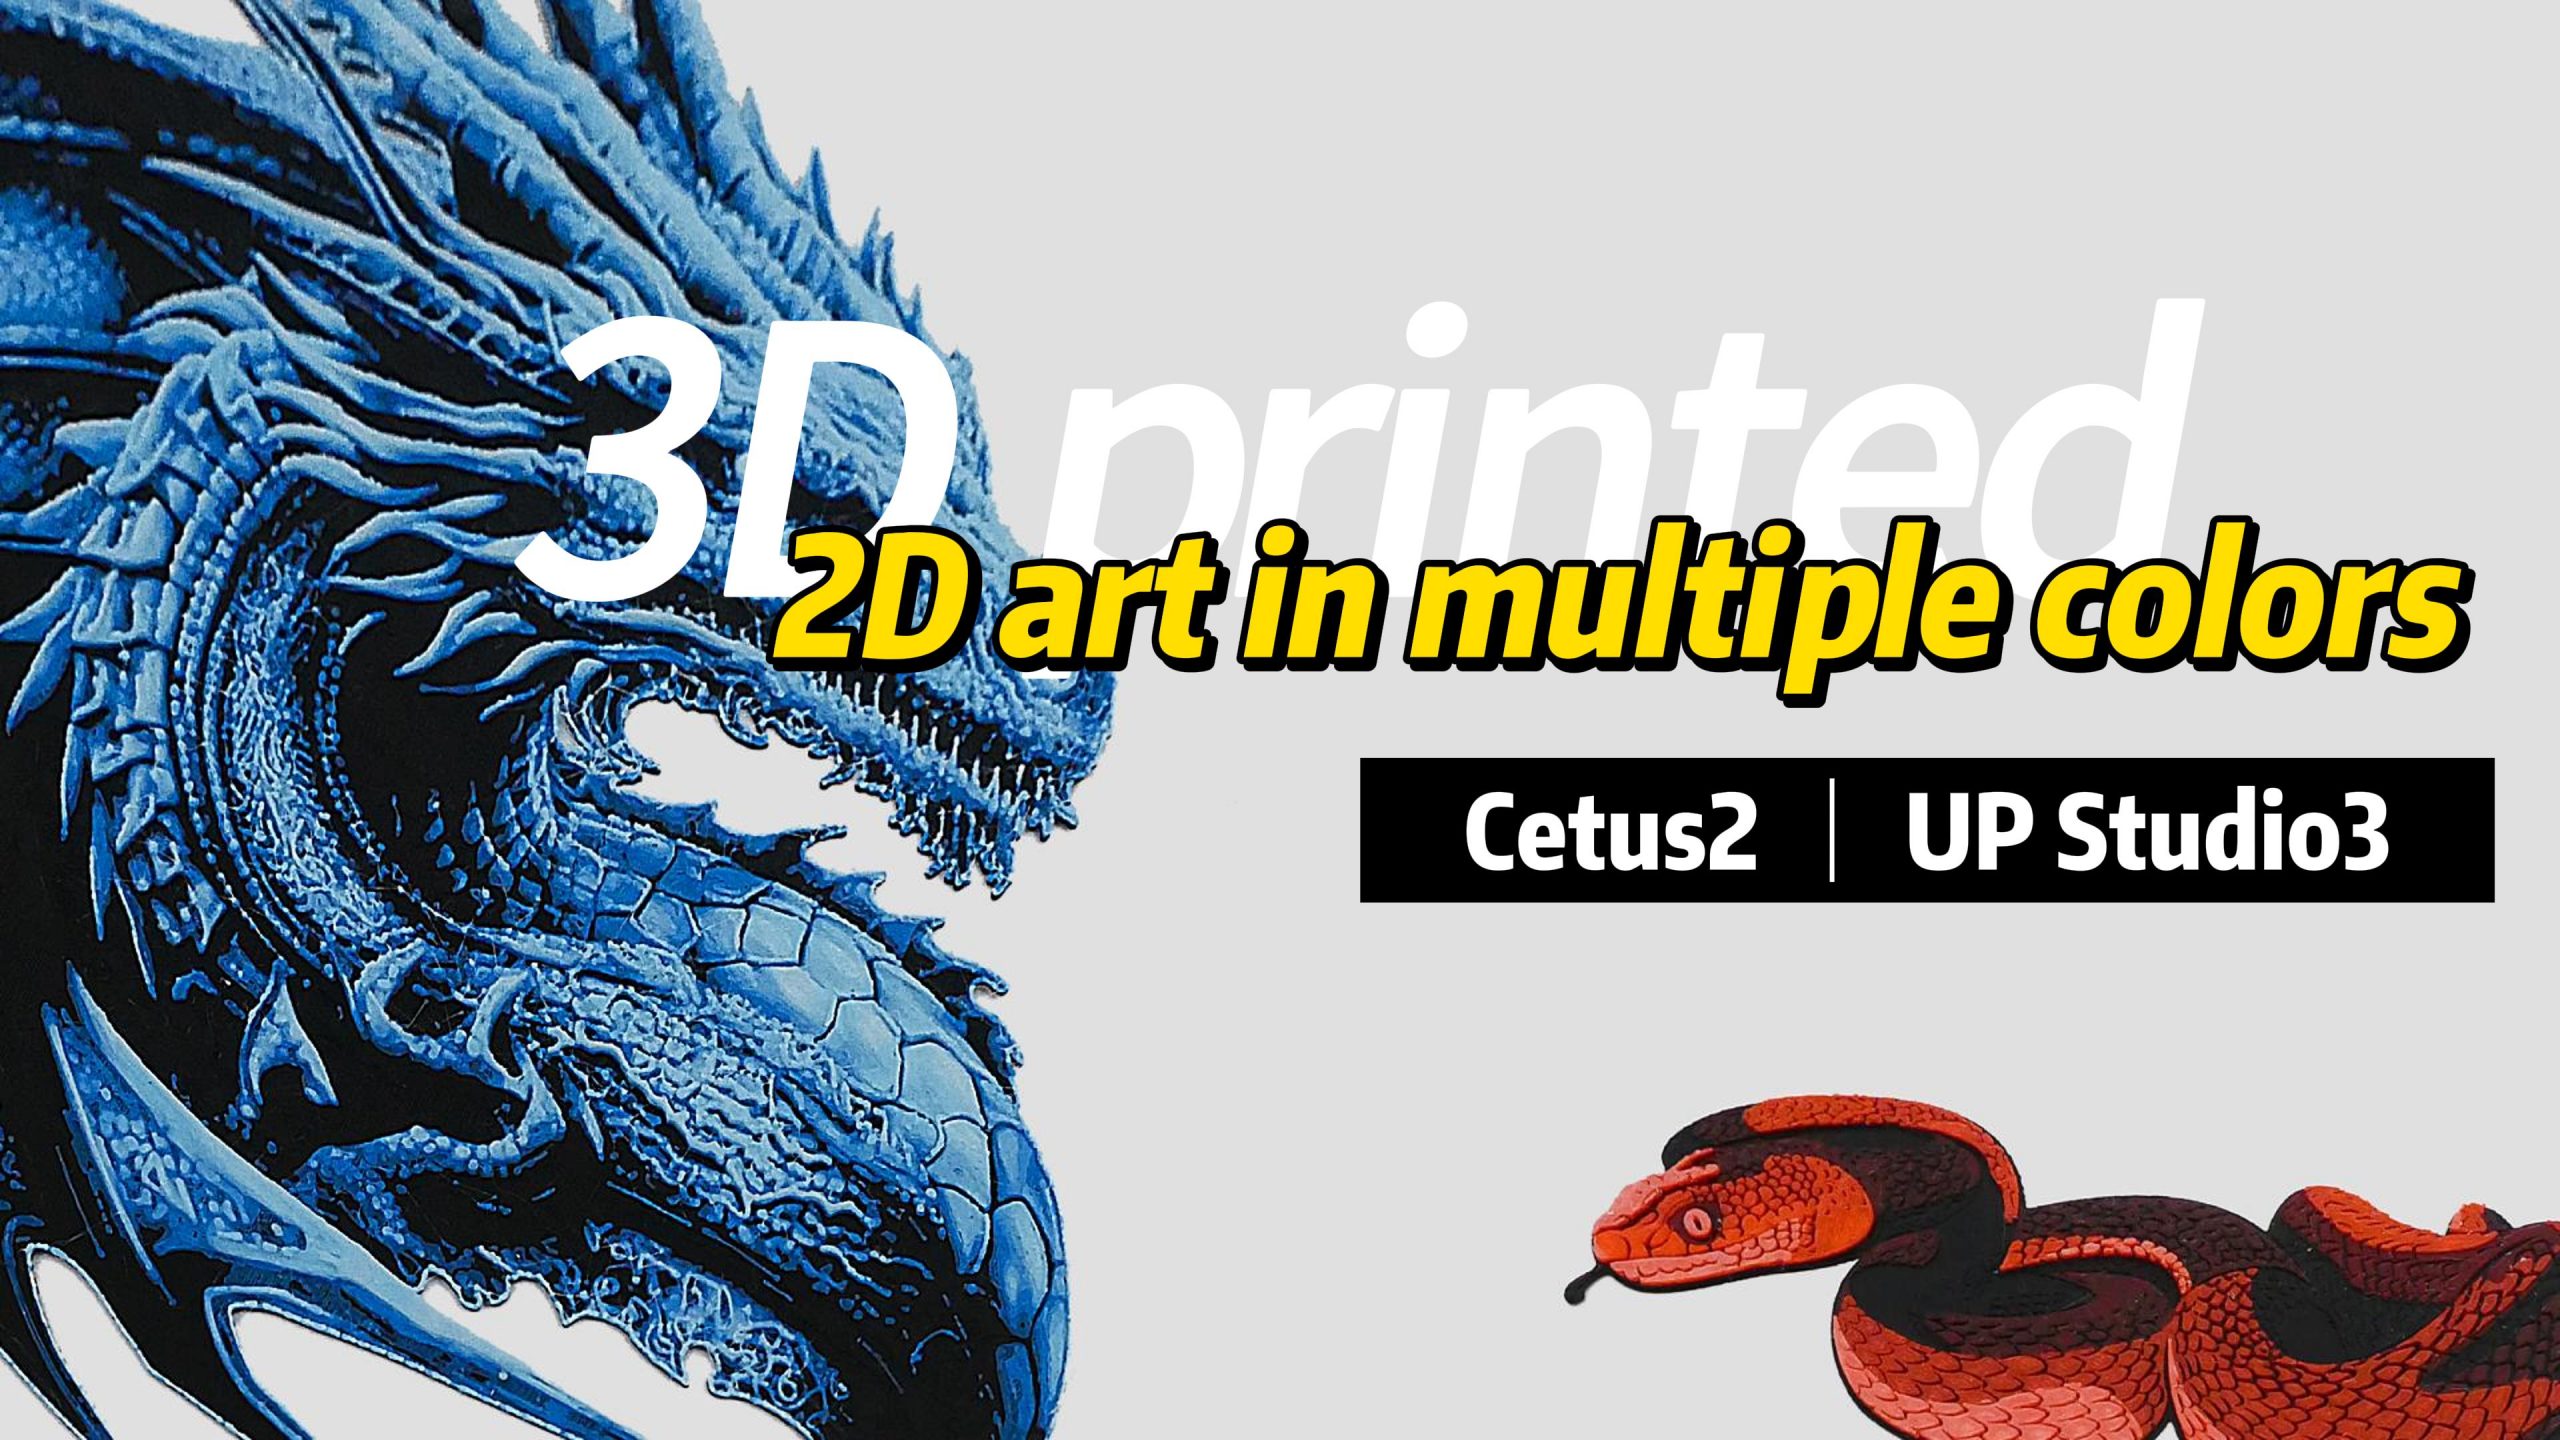
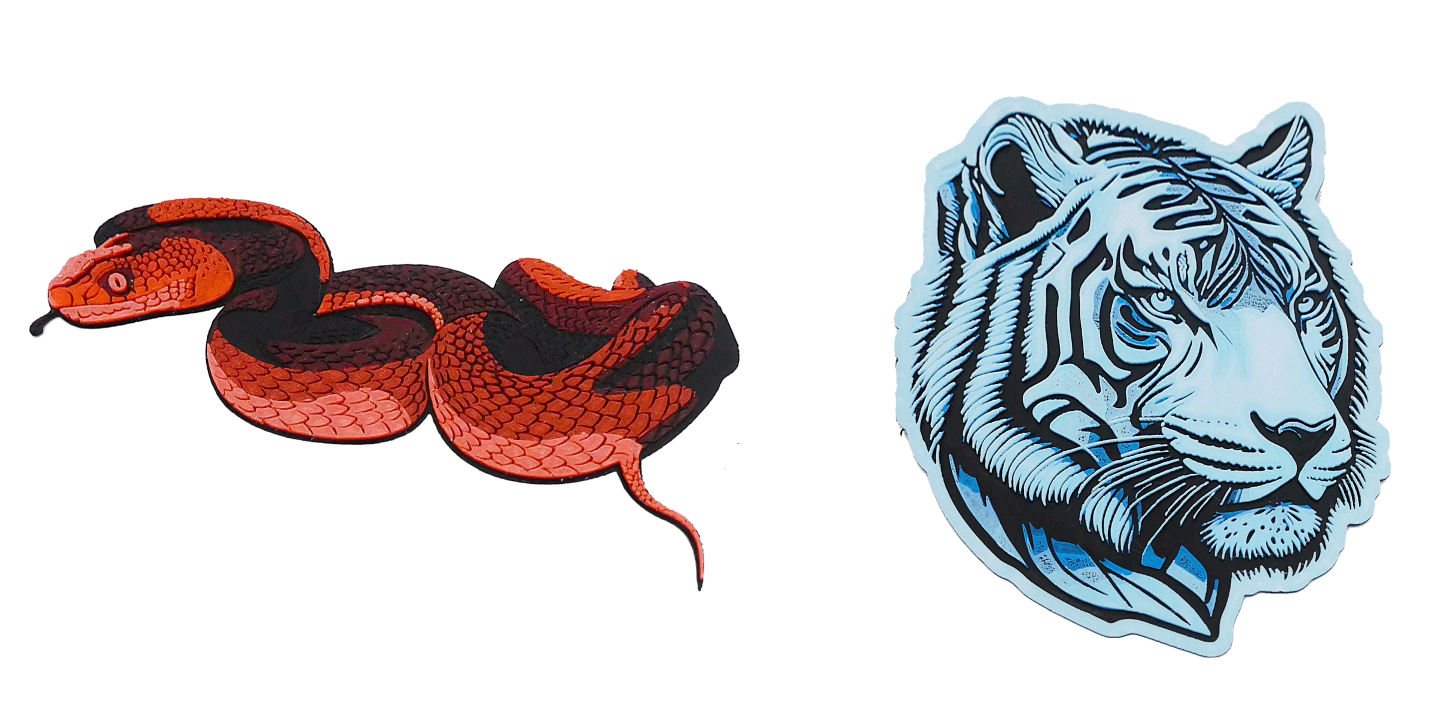
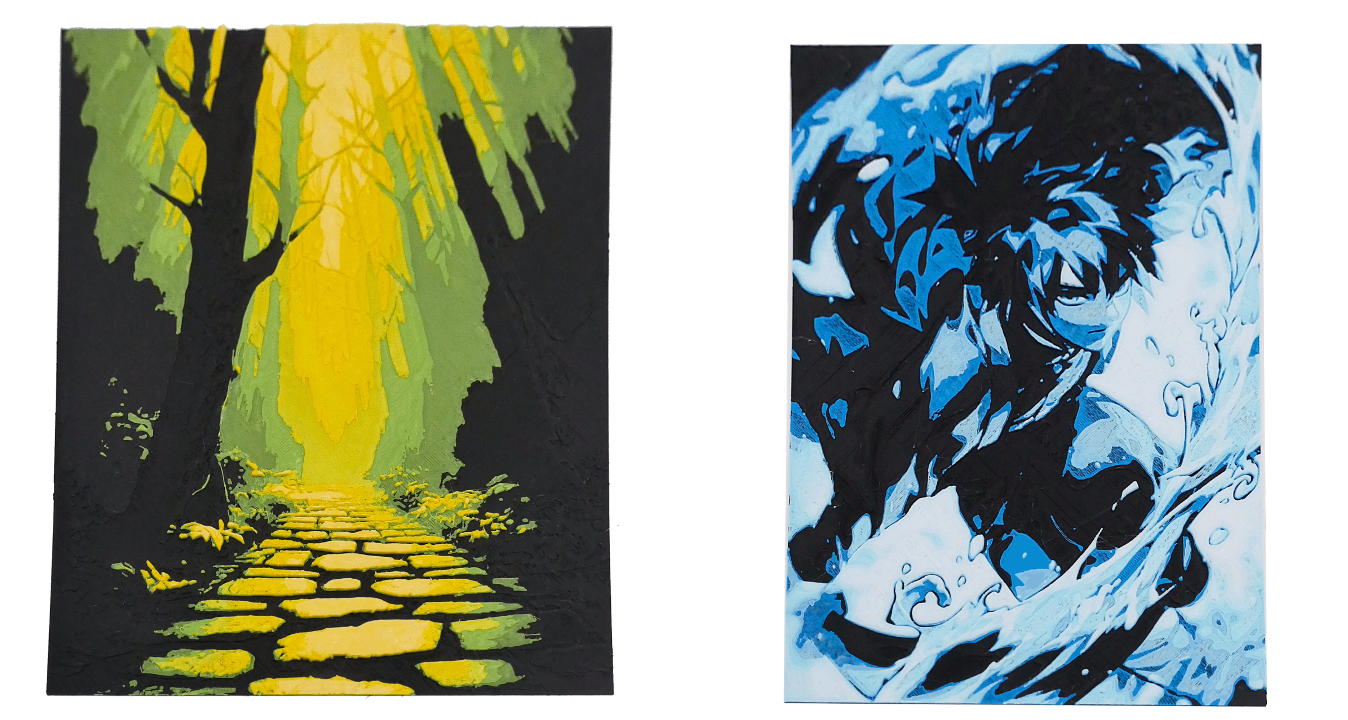
Have you ever thought about using a 3D printer to "draw pictures"? Look, this is a print printed using our Cetus2. Do you want to know how it is set up? Please read on.
Software Use: Hueforge - convert 2D image into 3D Color sections.
Download link:
https://shop.thehueforge.com/collections/hueforge
Step 1
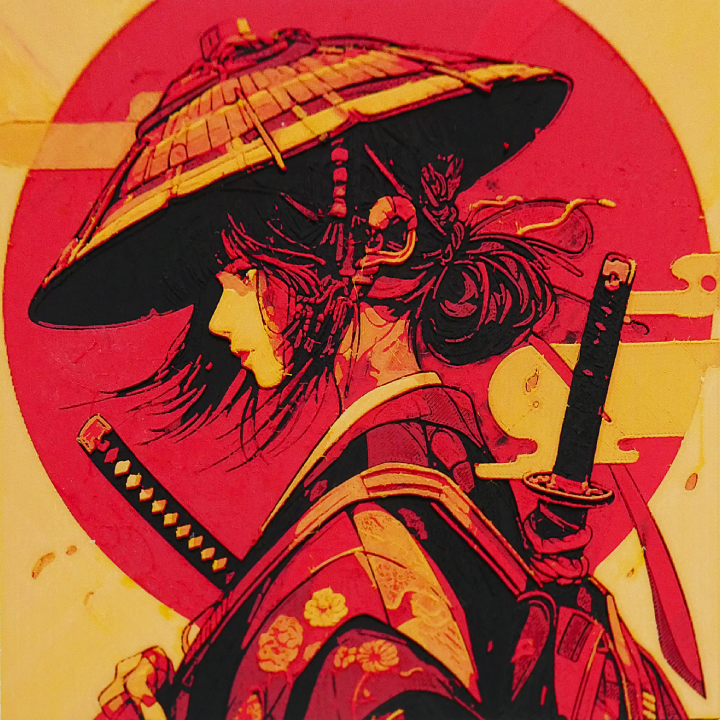
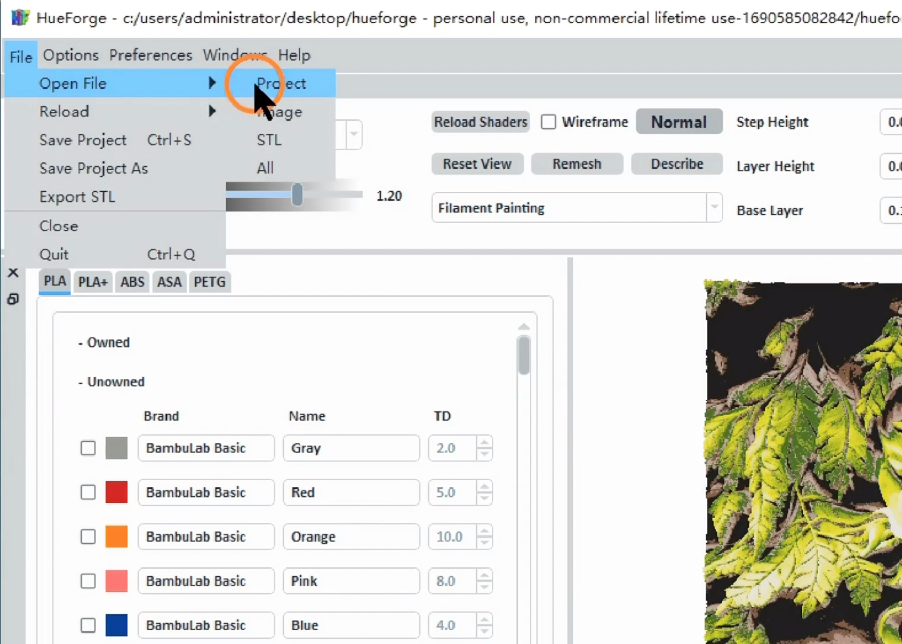
Import the pictures you want to print into Hueforge. Then set the picture in the software, add color to the picture and set the color thickness. Then export it as an STL file.
Step 2
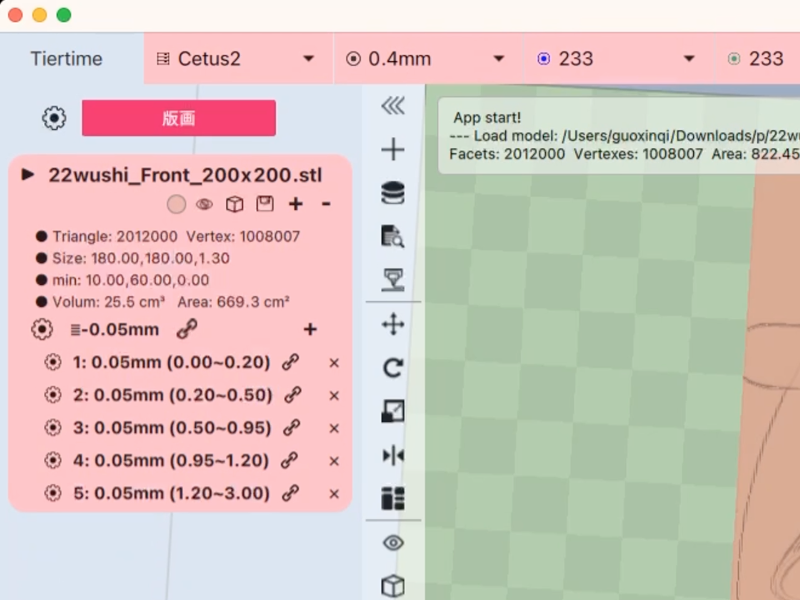
Set up layer sections in UP Studio3. Adjust different sections thickness according to the section thickness generated by Hugeforge. And change the adjusted second and fourth sections to print with nozzle two.
Step 3
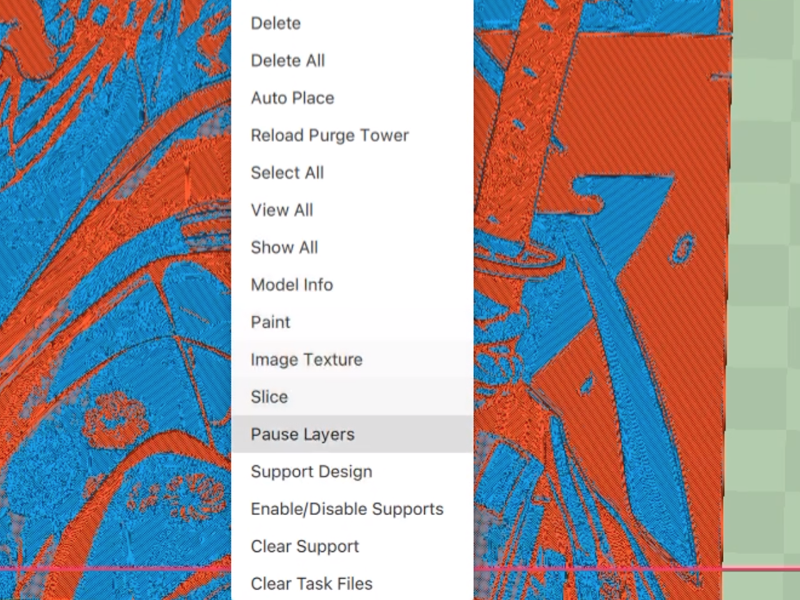
The very important thing: We need to pause the printer during printing so that we can replace the other two colors. In the first layer of the third section, right-click and select Add a Pause Layer. When the printer pause at here swap filament spools with other colors.
If you are interested in this, you can watch the following video for a more detailed tutorial.
If you are interested in multi-color printing, you can try it yourself. If you have any questions, you can try to contact us.